As you may recall from my earlier post, I found the cost of installing a new 240V circuit was too high and threatened my ability to get a Level 2 charger at all, even if the charger was free. I contacted the electrician who installed out 120V circuit for only $125. I know the 240V circuit is like having two 120V circuits, so I expected something around $250. I really, really wanted a quicker way to charge my Volt!
To get ready for this, we need to have a 240 Volt, 40 amp breaker, line and outlet installed. Specifically, the specs I received from SPX (the group supplying my Level 2 charger) would be:
- NEMA 6-50R Outlet and box
- 2 pole, 40 amp breaker
- 3 conductor wire ( two #8’s and one #10 for ground)
I contacted the electrician who installed our 110 volt, 20 amp circuit, back when I got my Volt. He sent a quote for $998. (ouch) I was caught by surprise, since the 110 volt line was only $125. I asked about that and he said the reason it was so much more expensive is:
- It is a longer run, requiring more wire than before.
- It is a bigger gauge wire, which is much more expensive
- The larger wire will require larger conduit.
The portion of the proposal we got from the SPX rep was $760, so my electrician was even higher than theirs!
I didn’t think we could afford either bid, so I contacted my electrician and thanked him for the quote but said we couldn’t afford it. Surprisingly, he requoted the job for $635! Now he was less expensive than the SPX electrician. I asked if the second quote included any downgrades or compromises. He assured me it did not, that he’d just discounted the labor and markup on the wire.
One thing: Remember we leased another Volt. All our installation costs were about to double!
We received a quote for a Level 2 charger for my wife’s Volt. This one came in higher than mine! They are exactly the same units and will be mounted on a wall no more than four inches from one another. I contacted the SPX rep to ask about that, but he said he didn’t know why the two units would have different installation costs. Although incredibly frustrated by this, I was determined to find a way.
Even though our electrician had quoted to lowest price so far ($635) we now were looking at double that because of the two Volts. $1270 for the two 240V circuits plus the two installations ($319 and $386) was rapidly making this a pipe dream.
Then a funny thing happened.
A neighbor friend of mine, Jim was standing in his yard as I was driving home. I hadn’t seen him in a while, so I pulled over to brag about the Volts. I was ranting about all the hassle associated with getting the ‘free’ chargers (definitely a first-world problem, I know) and Jim said, “Why don’t you run the circuits yourself?”
Well, there’s a reason for that. 110V is no problem. I have extended existing circuits to add a new light fixture, minor stuff like that, but I had only pulled the face off my circuit breaker panel once. It was not a good experience. Let’s go back in time a bit, so you can understand my trepidation…
Back in the late 1980’s, there was an outlet in our garage that wasn’t providing power. The breaker had not tripped. The wires within the outlet box were all properly connected. I was stumped. “Perhaps the breaker is bad.” I thought. I devised a way to test this. I removed the front panel and decided a way to test this would be to go around the breaker and connect a wire from the buss bar to the outlet side of the breaker. Yeah, I know. Dumb idea. I had the volt meter’s contact wire unplugged from the unit and decided that would work. I touched one end to the outlet side of the breaker and then touched the probe end to the buss bar.
Sparks flew and the tip of the probe was vaporized. I did not pee my pants but I came pretty close. I then put the cover back on the panel, closed the door and called an electrician. Back to the present day:
Jim told me he had completely wired his lake house and could help me run my circuits. He even offered to go to the hardware store and price the items we needed while I was at work the next day. What a guy!
The total, including sales tax for both circuits was $342.50. By doing the work with Jim, I was going to save $927.50! We were back in business!
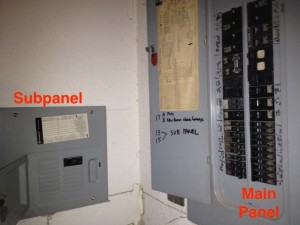
We had had a room added, over the garage, a few years back. Part of the project  included adding a secondary electrical panel. There were no circuits run from that panel, until we had the 120V line installed for the first Volt’s charger. It was fed by a 100 amp circuit from the main panel and 20 amps of that were being routed to the 120V line. That left another 80 amps for the two 40 amp circuits we were going to install. Perfect!
The next afternoon, when I got home from work, Jim accompanied me to Lowe’s to get what we needed. They didn’t have the same three-conductor wire that had been quoted by the various electricians, so we got three-conductor, 8 gauge wire. This was better than what we had been quoted by the professionals.
The Summer heat had broken in Texas, so it wasn’t bad in the attic. We had decided to route the circuits through the attic, rather than through conduit in the garage. I went into the attic and drilled holes in the header boards of the wall and Jim fed the heavy, stiff wire up to me. The area where I was working has a low ceiling, so I jabbed my head onto roofing nails a couple times. Ouch!
Being bald, there’s just no way to hide that, other than to start wearing a hat.
While I was pulling cable through the attic, Jim pulled the secondary electrical panel out of the wall so he could pull the cables back down, when I reached a position above it, in the attic. The cables were secured at both ends of the attic run, as well as a few places along the run, with heavy duty cable staples. I think I did a pretty good job up there.
When I came back down, Jim had reinstalled the secondary panel into the wall and had the wires I had fed down, through the wall, sticking out of it.
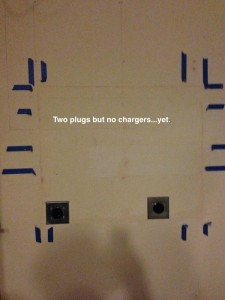
 The next step was the wall where the chargers would be mounted. Jim had removed a section of sheetrock so we could feed the cables through the wall, into the attic and now, we put up horizontal 2X4’s that would be used to mount the outlet boxes and to mount the chargers. The installation manual for the chargers gave me almost all the information I needed, except for the dimensions of the screw pattern. I had contacted a Blink engineer who gave me the missing information, so we knew exactly where the mounting holes would be to have the charger at the recommended height and exactly where the outlet should go in relation to those mounting holes. Have I mentioned before that I was a manufacturing engineer for many years?
Once the breakers were inserted into the sub panel, the boxes for the plugs and the plugs installed and the wires connected at both ends, it was time to put the sheetrock back up and start waiting.
While I waited, I started thinking about the breakers. Usually, in a garage, GFCI or ground-fault circuit interruption breakers are used. This is to prevent electric shock. You may have GFI outlets in your kitchen or bath areas. This preyed on my mind. None of the electricians had quoted GFCI breakers, and the chargers have their own ground fault detection and protection, but I wanted the safest installation possible. After a few days I began searching for GFCI breakers. Holy cow they’re EXPENSIVE! I have a General Electric panel, so I went looking for GE breakers online, since the local hardware stores didn’t seem to carry items like this. The prices for the ones I needed (THQL2140GF1) ranged as high as $423.00 each. Fortunately, I kept looking and calling to check stock and found them for $104.00 each at a place called Widespread Electrical Sales. They had both refurbished and new, but told me the two I would receive were new.
Installation of these was super easy, so I didn’t have to call Jim for help this time around. I may have gone overboard here, but it makes me more comfortable and that’s worth it to me.


